Introduction
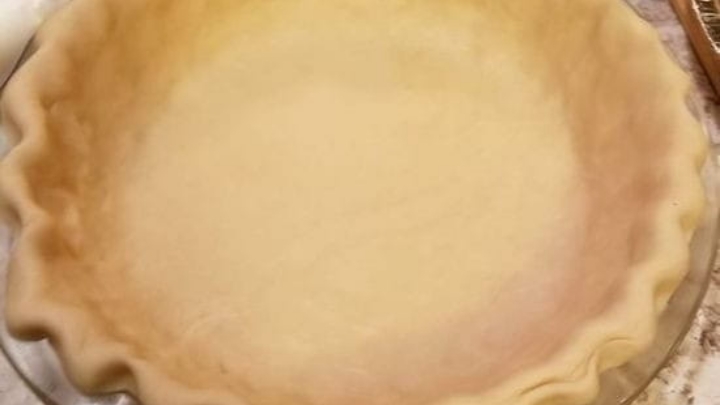
When it comes to homemade desserts, nothing beats the charm and taste of a classic pie. Whether you’re preparing an apple pie for Thanksgiving, a creamy chocolate pie for a special occasion, or a savory chicken pot pie for dinner, the secret to perfection lies in the crust. Today, I’m sharing Grandma’s pie crust recipe, a tried-and-true method that guarantees a flaky, buttery, and melt-in-your-mouth crust every time. This recipe is perfect for beginners and seasoned bakers alike.
In this guide, I’ll walk you through every step of making the perfect pie crust from scratch. Plus, I’ll share tips and tricks to elevate your baking game to a professional level.
Why This Recipe Stands Out
Grandma’s pie crust recipe has been passed down through generations for good reason. Unlike store-bought crusts, this homemade version:
- Is made with simple ingredients you probably already have in your pantry.
- Results in a tender yet flaky texture that perfectly complements any filling.
- Can be customized for sweet or savory pies with ease.
Ingredients You’ll Need
To make the best pie crust, you’ll need just five basic ingredients:
- All-purpose flour – Provides structure and stability to the crust.
- Unsalted butter – Ensures flakiness and a rich, buttery flavor.
- Shortening – Adds tenderness to the crust.
- Cold water – Helps bind the ingredients together without making the dough sticky.
- Salt – Enhances the flavor of the crust.
Step-by-Step Instructions
1. Prepare Your Workspace
Start by gathering all your ingredients and tools. You’ll need:
- A mixing bowl
- Measuring cups and spoons
- A pastry cutter or two forks
- A rolling pin
- A pie dish
Pro tip: Keep your butter, shortening, and water as cold as possible. This is the secret to achieving those irresistible flaky layers.
2. Combine the Dry Ingredients
In a large mixing bowl, whisk together 2 ½ cups of all-purpose flour and ½ teaspoon of salt. This ensures the salt is evenly distributed throughout the dough.
3. Cut in the Butter and Shortening
Add 1 cup of cold, unsalted butter (cut into small cubes) and ½ cup of cold shortening to the flour mixture. Use a pastry cutter or two forks to cut the fats into the flour until the mixture resembles coarse crumbs. Small pea-sized pieces of butter are ideal for creating those flaky layers.
4. Add Cold Water Gradually
Drizzle in 6–8 tablespoons of ice-cold water, one tablespoon at a time, while gently mixing the dough with a fork. Be careful not to overwork the dough. Stop adding water as soon as the dough starts to come together and can be pressed into a ball.
5. Chill the Dough
Divide the dough into two equal portions, shape them into discs, and wrap them tightly in plastic wrap. Refrigerate for at least 30 minutes (or up to 24 hours) to relax the gluten and make the dough easier to roll out.
6. Roll Out the Dough
On a lightly floured surface, roll out one disc of dough into a circle about 12 inches in diameter. Be sure to rotate the dough frequently to prevent sticking. Carefully transfer the rolled-out dough to your pie dish, pressing it gently into the corners.
Tips for a Flawless Pie Crust
- Use cold ingredients. Warm butter or water can cause the dough to become sticky and difficult to handle.
- Don’t overwork the dough. Mixing too much can result in a tough crust.
- Chill the dough. This step is crucial for maintaining the structure and flakiness of the crust.
- Blind bake for certain fillings. If your filling is wet or doesn’t require baking, partially bake the crust first to avoid sogginess.
How to Blind Bake a Pie Crust
Blind baking is the process of pre-baking a pie crust before adding the filling. This is especially useful for pies like lemon meringue or chocolate cream. Here’s how to do it:
- Roll out your pie dough and place it in the pie dish.
- Line the crust with parchment paper or aluminum foil, then fill it with pie weights, dried beans, or rice.
- Bake at 375°F (190°C) for 15 minutes. Remove the weights and bake for another 5–7 minutes until golden brown.
Frequently Asked Questions
1. Can I make this pie crust ahead of time? Yes! You can refrigerate the dough for up to 2 days or freeze it for up to 3 months. Just thaw it in the fridge overnight before using.
2. Can I use salted butter instead of unsalted? While unsalted butter is recommended for better control of the salt content, you can use salted butter in a pinch. Simply reduce the added salt by half.
3. What if I don’t have a pastry cutter? No problem! Two forks or even clean hands can do the job. Just be sure to work quickly to keep the butter cold.
Pairing Ideas: Best Pie Fillings for This Crust
This versatile pie crust pairs beautifully with a variety of fillings. Here are some ideas to get you started:
- Sweet: Apple, cherry, pumpkin, pecan, chocolate cream.
- Savory: Chicken pot pie, quiche, vegetable tart.
Final Thoughts
Mastering a pie crust is a skill every home baker should have, and with Grandma’s recipe, success is guaranteed. Whether you’re baking for a holiday feast or a casual family dinner, this crust will make your pies the highlight of any meal.
If you loved this recipe, be sure to bookmark it for future use and share it with your friends and family. Happy baking!
