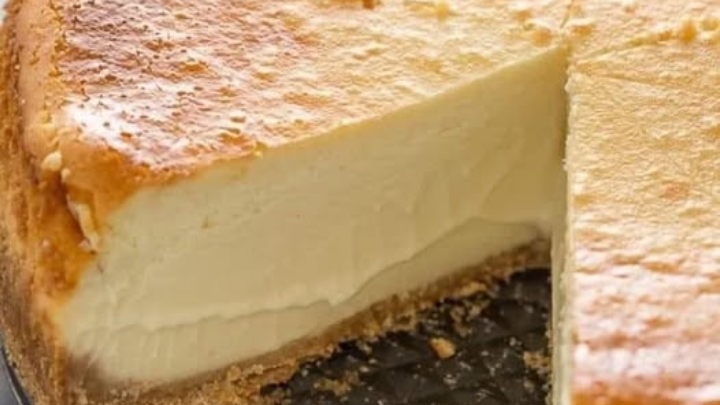
When it comes to indulgent desserts, few can rival the creamy, luscious texture of a classic New York cheesecake. Whether it’s a family gathering, a festive occasion, or simply a treat for yourself, this dessert never fails to impress. Here, we’ll walk you through a step-by-step recipe to make a perfect cheesecake at home—one that’s rich, velvety, and absolutely unforgettable.
Ingredients You’ll Need
For the Crust:
- 2 cups (200g) of graham cracker crumbs
- 1/2 cup (115g) of unsalted butter, melted
- 1/4 cup (50g) of granulated sugar
For the Filling:
- 4 (8 oz each) packages of cream cheese, softened
- 1 1/4 cups (250g) of granulated sugar
- 1/4 cup (30g) of all-purpose flour
- 1 cup (240ml) of sour cream, at room temperature
- 1 tablespoon of vanilla extract
- 4 large eggs, at room temperature
Equipment:
- 9-inch springform pan
- Mixing bowls
- Electric mixer
- Baking sheet
- Aluminum foil
Step 1: Prepare the Crust
- Crush the Graham Crackers: Begin by crushing your graham crackers into fine crumbs. You can use a food processor for ease, but a rolling pin works just as well.
- Combine Ingredients: In a medium bowl, mix the crumbs, melted butter, and sugar until evenly combined. The mixture should resemble wet sand.
- Form the Base: Press the crumb mixture firmly into the bottom of a 9-inch springform pan, creating an even layer. Use the back of a spoon or the bottom of a glass to compact it well.
- Pre-Bake: Bake the crust at 325°F (160°C) for 10 minutes. Remove from the oven and let it cool while you prepare the filling.
Step 2: Make the Cheesecake Filling
- Cream the Cheese: In a large bowl, beat the softened cream cheese on medium speed using an electric mixer until smooth and creamy. This step ensures a lump-free filling.
- Add Sugar and Flour: Gradually add the sugar and flour, beating until fully incorporated.
- Blend Sour Cream and Vanilla: Add the sour cream and vanilla extract, and mix on low speed until just combined. Avoid overmixing, as it can introduce too much air into the batter.
- Incorporate Eggs: Add the eggs one at a time, mixing on low speed after each addition. Scrape down the sides of the bowl to ensure everything is evenly mixed.
Step 3: Assemble and Bake
- Prepare the Pan: Wrap the bottom of your springform pan tightly with aluminum foil to prevent water from seeping in during the water bath.
- Pour the Filling: Pour the cheesecake batter over the cooled crust, smoothing the top with a spatula.
- Create a Water Bath: Place the springform pan in a large roasting pan. Pour hot water into the roasting pan until it reaches halfway up the sides of the springform pan. This step helps prevent cracks by maintaining an even temperature.
- Bake: Bake the cheesecake at 325°F (160°C) for 1 hour and 15 minutes, or until the edges are set and the center still has a slight wobble.
Step 4: Cool and Chill
- Turn Off the Oven: Once baked, turn off the oven and leave the cheesecake inside with the door slightly ajar for 1 hour. This gradual cooling process helps prevent cracks.
- Cool at Room Temperature: Remove the cheesecake from the water bath and let it cool completely on a wire rack.
- Chill: Cover the cheesecake and refrigerate it for at least 4 hours, preferably overnight. This step allows the flavors to meld and the texture to firm up.
Step 5: Serve and Enjoy
- Release from Pan: Run a knife around the edges of the cheesecake before releasing the springform pan.
- Slice and Serve: Use a clean, sharp knife to cut slices, wiping the blade between cuts for clean edges.
- Optional Toppings: Top your cheesecake with fresh berries, whipped cream, chocolate drizzle, or a dusting of powdered sugar.
Tips for the Perfect Cheesecake
- Room Temperature Ingredients: Ensure all your ingredients, especially cream cheese and eggs, are at room temperature. This guarantees a smooth, creamy batter.
- Avoid Overmixing: Overmixing can incorporate too much air, causing the cheesecake to rise and fall, leading to cracks.
- Water Bath is Key: The water bath (also known as a bain-marie) helps maintain an even temperature, preventing the cheesecake from drying out or cracking.
- Patience is Crucial: Allowing the cheesecake to cool gradually and chill fully ensures the best texture and flavor.
Frequently Asked Questions
1. Can I Use a Different Crust?
Absolutely! While graham cracker crust is traditional, you can use crushed Oreos, digestive biscuits, or even a nut-based crust for a unique twist.
2. How Do I Store Cheesecake?
Store your cheesecake in an airtight container in the refrigerator for up to 5 days. For longer storage, freeze individual slices wrapped tightly in plastic wrap and aluminum foil.
3. What’s the Secret to Preventing Cracks?
Using a water bath, avoiding overmixing, and cooling the cheesecake gradually are the best ways to prevent cracks.
4. Can I Add Flavors to the Filling?
Yes! You can mix in melted chocolate, fruit purees, or spices like cinnamon to customize your cheesecake.
Why This Cheesecake Stands Out
This classic New York cheesecake recipe combines simplicity with sophistication. The buttery, slightly crunchy graham cracker crust perfectly complements the creamy, tangy filling. Each bite offers a melt-in-your-mouth experience that’s hard to resist. Plus, with the tips and tricks provided, even beginners can master this timeless dessert.
Final Thoughts
A homemade cheesecake is more than just a dessert; it’s a labor of love. With its silky texture and rich flavor, this New York cheesecake is sure to become a family favorite. Whether you’re celebrating a special occasion or simply satisfying a sweet craving, this recipe delivers perfection every time.
So why wait? Gather your ingredients, preheat your oven, and treat yourself to the ultimate dessert experience. Your taste buds will thank you!
